Oct 08, 2026
Concrete Paving Stones Installation: What the Process Looks Like from Ground Up
Table of Contents
A paving stone patio or pathway looks like a surface project. It is not. By the time the first stone goes down, most of the work that determines how the finished project will look and perform in five years is already done. Concrete paving stones installation is fundamentally a base-preparation job that finishes with a visible surface.
Understanding what happens below the surface before any stone is laid helps you evaluate quotes better, ask the right questions of any contractor, and set realistic expectations about timeline and cost.
Concrete Paving Stones Installation Starts Below the Surface
The installation starts with excavation. The existing surface, whether grass, gravel, old concrete, or soil, is removed to a depth that accommodates the base layers plus the stone thickness. For a residential patio or walkway, that typically means excavating 6 to 8 inches below the finished surface elevation. For a driveway that will carry vehicle weight, 8 to 12 inches is more common.
Once excavated, the subgrade, the native soil at the bottom of the dig, is compacted. As we explain in our guide on how soil sets the foundation for landscaping, compaction is not optional. Loose or inadequately compacted soil settles unevenly over time and creates the low spots and rocking stones that show up years after installation.
Drainage slope is established at this stage. The base is graded to slope away from structures at a minimum of 1 percent grade, which is roughly 1/8 inch of drop per foot of run. Getting this wrong at the subgrade level means the error carries through every layer above it.
The Base Layers and What Each One Does
On top of the compacted subgrade goes a crushed stone aggregate base, typically 4 to 6 inches deep for pedestrian applications and deeper for driveways. This layer provides structural support and drainage. The aggregate must be angular crushed stone, not rounded gravel. Angular particles lock together under compaction. Rounded particles shift.
Above the aggregate base is a thin layer of coarse sand, usually about one inch, screeded flat and level. This is the bedding layer on which the pavers sit. It allows for minor adjustments in stone height and provides a stable seat for each paver.
The sand layer should not be compacted before the pavers go down. It remains loose enough to allow the stones to be set at the correct height and then locked in place once the full surface is installed and final compaction runs over it.
Setting Pavers and Managing the Pattern
Paver installation starts from a fixed edge, typically a structure, a border row, or an edge restraint, and works outward. The pattern, whether running bond, herringbone, basketweave, or a custom design, is established early and maintained consistently across the field.
Cuts happen at edges and around obstacles. Straight cuts along a border are quick. Angled cuts around curved edges or irregular shapes take more time and skill. Complex patterns with diagonal orientations require more cuts per square foot than straight grid patterns, which is reflected in labor cost.
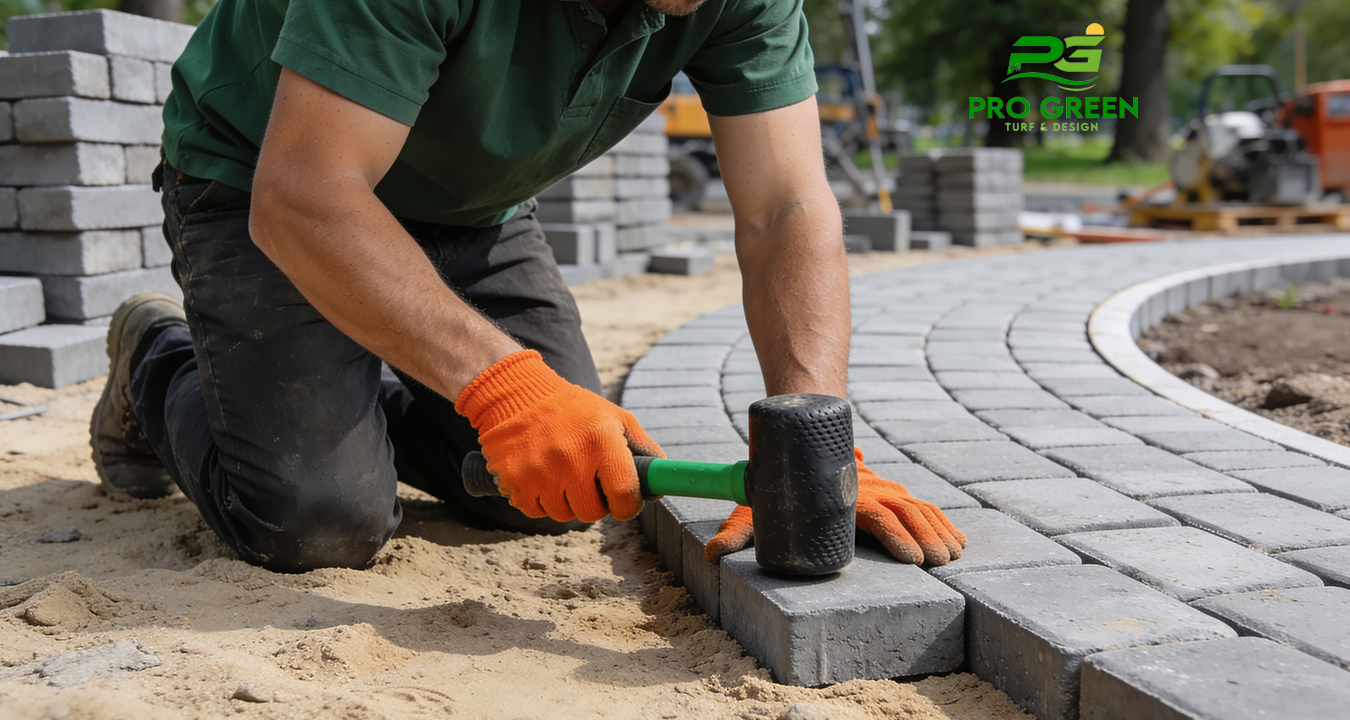
Each paver is set by hand, tapped down with a rubber mallet, and checked for level and alignment against adjacent stones. This is exacting work. A paver that is slightly high or low relative to its neighbors creates a tripping edge and affects how water runs across the surface.
Jointing, Compaction, and Long-Term Care
After all pavers are set, the joints between them are filled with polymeric jointing sand. This is a sand mixed with a binding agent that hardens when wet and reduces weed growth and insect intrusion compared to plain sand. The sand is swept across the surface, worked into the joints, and then the entire surface is compacted with a plate compactor and activated with a fine water mist.
The compaction step settles the pavers firmly into the bedding sand and locks the pattern in place. It also reveals any stones that are slightly out of plane, which can be corrected before the project is complete.
Maintenance going forward is minimal but not zero. Polymeric sand wears down over years of weathering and traffic and should be refreshed every three to five years. Sealing the surface is optional but extends the color and makes cleaning easier. Any individual stone that shifts or cracks can be removed and replaced without disturbing the surrounding installation. For more ideas, check out our low-maintenance landscaping ideas.
Partner with Pro Green Turf & Design
At Pro Green Turf and Design, we install concrete paving stones for patios, walkways, driveways, and hardscaping projects across the Lower Mainland and Fraser Valley. We handle site preparation, base construction, paver installation, and jointing as a complete service.
If you have a paving project coming up, we offer free quotes and can assess what your specific site needs.